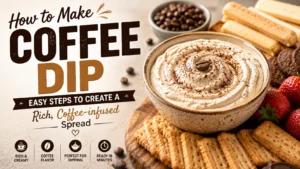

Ever wondered how baristas create that velvety crown atop your iced latte? Learning how to make coffee cold foam is easier than you think, and it transforms a simple cold brew into a café‑worthy treat. In just a few minutes, you can add a silky layer that enhances both texture and flavor, and the process requires no special equipment beyond a jar or a small whisk.
Cold foam adds a luxurious mouthfeel that contrasts with the crispness of iced coffee. It also traps aromatics, allowing the coffee’s fragrance to linger longer. Furthermore, the visual appeal of a smooth, white crown elevates the drink’s Instagram‑ready status.
The type of milk you select directly influences foam volume and stability. Whole milk, with its higher fat content, produces a richer, creamier foam. However, skim milk creates a lighter, more voluminous foam that holds peaks longer. Plant‑based alternatives behave differently; oat milk often yields a silky texture similar to dairy.
In addition, almond milk can produce foam but tends to separate faster. As a result, baristas recommend experimenting with ratios to find your preferred balance.
You do not need an expensive espresso machine to craft cold foam. A simple French press works exceptionally well by pumping the plunger up and down. Alternatively, a handheld milk frother or a sealed jar shaken vigorously can achieve similar results.
For those who prefer precision, a digital thermometer ensures the milk stays cold enough. Moreover, a measuring spoon helps you add syrups or spices consistently. Therefore, gathering these tools beforehand streamlines the process.
When cold milk is agitated, its proteins denature and form a network that traps air bubbles. Fat globules stabilize these bubbles, preventing them from collapsing too quickly. Keeping the milk below 40°F (4°C) slows bacterial activity and preserves the protein structure, which is essential for lasting foam.
In addition, the absence of heat means lactose remains intact, contributing a subtle sweetness that complements the coffee. Consequently, understanding this basic science lets you tweak variables like temperature and agitation time for optimal results.
Begin by pouring cold milk into your chosen frothing vessel. Use about ½ cup (120 ml) of milk for a single serving. In addition, add any desired sweetener or flavor syrup before frothing to embed the taste uniformly.
If using a French press, place the lid on and pump the plunger up and down vigorously for 20‑30 seconds. This motion injects air, creating microbubbles that stabilize the foam. As a result, the volume will roughly double, yielding a thick, velvety texture.
With a handheld frother, immerse the whisk just below the surface and operate on high speed for 15‑20 seconds. Consequently, you will notice a smooth, glossy surface forming. However, avoid over‑frothing, which can turn the foam grainy.
After achieving the desired foam, gently swirl the vessel to incorporate any settled syrup. Furthermore, sprinkle a pinch of cinnamon, cocoa powder, or nutmeg for an aromatic finish. Therefore, each sip delivers a balanced blend of coffee sweetness and spice.
Pour your cold brew or iced coffee into a glass, leaving space at the top for foam. Then, spoon the cold foam onto the surface, allowing it to sit proudly. In addition, serve immediately with a straw or sip‑lid to enjoy the contrast of textures.
One frequent error is using warm milk, which collapses the foam almost instantly. Therefore, always start with milk straight from the refrigerator, ideally below 40°F (4°C). As a result, the proteins remain stable and can trap air effectively. Another pitfall is over‑sweetening before frothing, which can weigh down the bubbles.
In contrast, adding sweeteners after foaming preserves the light texture. Consequently, taste the foam first and adjust sweetness to your liking. Finally, neglecting to clean your frothing tool leads to off‑flavors and inconsistent results. Hence, rinse the French press or frother with warm water after each use. Moreover, a quick vinegar rinse removes residual oils that hinder foam formation.
Once you master the basic technique, you can explore flavor twists that keep your coffee routine exciting. For example, add a splash of vanilla extract and a drizzle of caramel sauce before frothing. In addition, a hint of peppermint oil creates a refreshing holiday‑inspired cold foam.
Alternatively, blend in a teaspoon of matcha powder for a vibrant green hue and earthy notes. As a result, you obtain a matcha‑infused cold foam that pairs beautifully with cold brew. Furthermore, a pinch of smoked sea salt adds a sophisticated savory‑sweet contrast.
Cold foam is best enjoyed fresh, but you can store leftovers for a short period. Transfer the foam to an airtight container and keep it refrigerated for up to 24 hours. However, note that the texture may soften, requiring a quick re‑froth before use.
To revive, pour the stored foam into a clean jar and shake vigorously for 10‑15 seconds. As a result, the bubbles regain their structure, restoring the silky feel. Therefore, you can extend the enjoyment of your homemade cold foam without waste.
Absolutely. A tightly sealed jar works well: pour cold milk inside, seal the lid, and shake vigorously for 30‑45 seconds. The agitation introduces air, creating foam that you can spoon onto your drink.
Oat milk tends to create the most stable foam among plant‑based options because its higher carbohydrate content helps trap air. Soy milk also performs well, while almond and coconut milks may require a stabilizer like a pinch of xanthan gum.
For optimal texture, use the foam immediately. If stored in an airtight container in the refrigerator, it remains usable for up to 24 hours, though it may lose some volume and require a brief re‑froth before serving.
Yes. Adding sweeteners after foaming prevents the added weight from collapsing the bubbles. Simply drizzle syrup or sprinkle sugar over the foam and give it a gentle stir to distribute the flavor evenly.
Dry spices like cinnamon, cocoa powder, or nutmeg can be sprinkled on top of the foam after it’s formed. This method adds aroma and taste without introducing extra liquid that could weaken the foam structure.
Grab your favorite milk, a French press or jar, and start experimenting with the techniques above. Share your creations on social media using #ColdFoamCraft and inspire fellow coffee lovers!




Contact Us Jump To How to Make Coffee Cold Foam: Master the Art of Silky, Café‑style Topping at Home Ever wondered how baristas create that velvety crown atop your iced latte? Learning how to make coffee cold foam is easier than you think, and…
Contact Us Jump To How to Make Coffee Creamer with Heavy Cream: a Simple, Rich Recipe for Your Morning Brew Key Takeaways: Heavy cream creates a luxuriously smooth, velvety coffee creamer that blends seamlessly with hot or cold coffee. Only three basic ingredients are…

Explore the world of coffee with honest reviews and practical advice. Find your perfect cup, one bean and machine at a time.