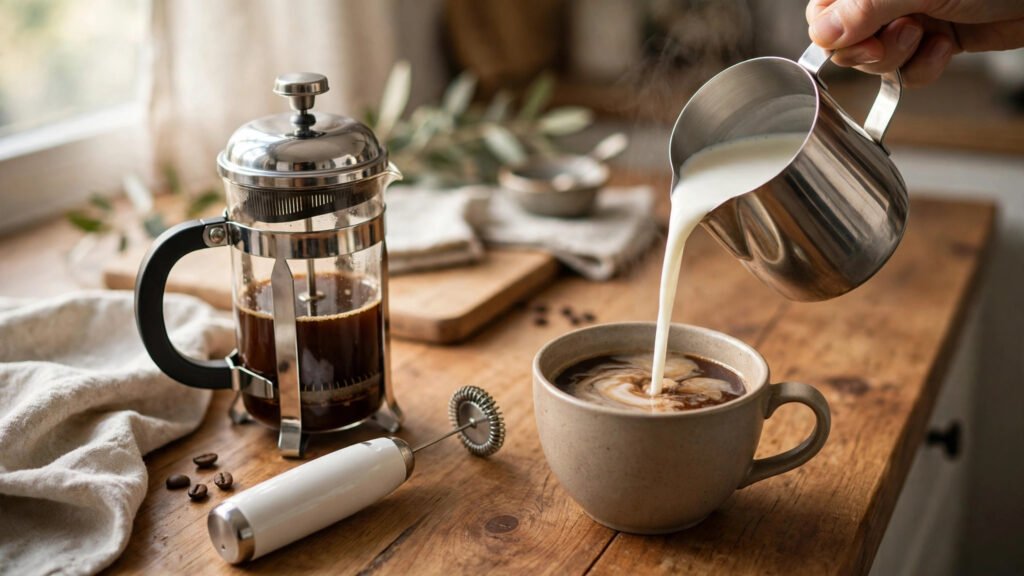
How to Froth Milk: Steam Wand vs No Machine, and Why Oat, Soy and Dairy Foam Differently
How to froth milk comes down to two jobs done at once: add air, and heat the milk. A steam wand does both in one go and gives the smoothest result, but a French press, a handheld frother or even a jar can get you close. The milk matters as much as the method — whole dairy foams easiest, barista oat is the best plant option, and almond often splits. This guide covers the steam-wand method, the four no-machine methods, and which milk to use for each.
What Frothed Milk Actually Is
Frothed milk is milk with tiny air bubbles folded through it — not a stiff cap of bubbles sitting on top. Good foam looks glossy, like wet paint, and pours like thin cream. Bad foam looks like bubble bath: dry, stiff, full of visible bubbles that sit on the coffee instead of mixing into it.
The two jobs — air and heat — each have a failure mode. Air without enough heat gives cold bubbles that collapse within seconds. Heat without air just gives you hot milk with no foam at all. Every method in this guide is really a different way of doing those two jobs, and the steam wand wins because it does them together, evenly, in under a minute.
Foam also changes how the drink tastes. Properly frothed milk tastes sweeter than plain heated milk, because the tiny bubbles spread the milk’s natural sugars across your tongue. Overheated milk does the opposite: past about 70°C (160°F) it tastes flat and cooked, and the foam breaks down. Temperature is not a detail — it is half the skill.
Steam Wand: The Method That Sets the Standard
Start with cold milk in a cold stainless-steel pitcher, filled to about a third to half full. Cold milk gives you more time before it hits temperature, and a cold pitcher buys you a few extra seconds too. Purge the steam wand first — a quick blast clears condensed water that would thin your milk.
Put the wand tip just below the milk’s surface and turn the steam on full. First comes the stretch: keep the tip near the surface so it makes a gentle “tss-tss” sound, adding air in small sips. You only need a few seconds of this — the milk should rise by about a third. Too much air here is the most common mistake, and it is what makes stiff, dry foam.
Then sink the tip deeper and let the milk spin. You want a whirlpool that folds the big bubbles back in and leaves the surface glossy — keep the pitcher still and let the vortex do the work. Stop at 60–65°C, wipe the wand clean and purge it, then swirl the pitcher and tap it once on the counter to pop any large bubbles. The milk should look like melted ice cream.
No Machine? Four Ways to Froth Milk
A French press gives the best no-machine foam. Warm the milk first — on the stove or in the microwave — to about 60–65°C, pour it into the press, then pump the plunger up and down briskly for 30–40 strokes. Let it rest for a minute, swirl, and pour. The fine mesh breaks big bubbles into small ones, so the texture comes surprisingly close to steamed milk.
A handheld frother is the fastest option. Warm the milk in a tall jug, hold the frother at a slight angle just under the surface, and run it for 20–30 seconds, moving it slowly up and down. It makes light, airy foam that works well for cappuccinos, though it rarely gets as smooth as steam-textured milk. Tap the jug on the counter to settle the biggest bubbles before pouring.
The last two need no gear at all. For the jar method, shake cold milk hard in a lidded jar for about 30 seconds until it doubles, then microwave it uncovered for 30 seconds to set the foam — the jar gets hot, so take care. Or warm the milk and whisk it vigorously in a bowl; the slowest method and the coarsest foam, but it works in a pinch. Neither matches steam-wand microfoam, but both make a good cappuccino topping — and that is what most mornings need.
Frothing by Milk Type
| Milk | How it foams | Watch out for |
|---|---|---|
| Whole dairy | Easiest to learn with; stable, glossy foam, tastes sweeter steamed | None — the forgiving default |
| Skimmed dairy | Foams fast and high | Stiff, dry foam that pours poorly; less flavour |
| Barista oat | Closest plant milk to dairy; holds foam well | Standard oat is thinner and varies by brand |
| Soy | Foams well, good volume | Can split in very hot or acidic coffee |
| Almond | Thin foam, fades fast | Often splits or turns grainy when steamed |
| Coconut | Light, sweet foam | Fades quickly; coconut flavour comes through |
Whole dairy milk is the easiest to learn with because its fat and protein hold tiny bubbles steady and forgive small mistakes. Skimmed milk foams up fast, which tempts beginners, but the foam it makes is stiff and dry — hard to pour with and quick to collapse into the drink.
Among plant milks, barista-edition oat milk behaves closest to dairy; it is made with a little extra fat and stabilisers for exactly this job. Standard oat milk, soy and almond vary a lot by brand, and almond in particular often splits or turns grainy when steamed. If you want the full drink-by-drink comparison — which milk suits lattes, cappuccinos, flat whites and black-coffee days — our guide to the best milk for coffee covers it in detail.
One practical rule: whatever milk you use, start cold and straight from the fridge. Warm milk that has already been heated once foams poorly and tastes cooked, so measure fresh milk for each drink instead of re-steaming what is left in the pitcher.
Cold Foam vs Hot Foam
Cold foam is milk frothed cold, not steamed — the thick, spoonable topping on iced lattes and cold brew. It is made with a frother or a French press and cold milk, usually skimmed or oat, and it sits on top of the drink instead of mixing in. It is a different skill from hot foam, with different milk choices and a different texture goal.
Do not steam milk for an iced drink. Hot foam melts the ice, thins the coffee and disappears within a minute. If the drink is cold, the foam should be cold too. Our guide to how to make coffee cold foam walks through the cold method step by step, including which milks hold a cold foam longest.
The reverse is true as well: cold foam on a hot latte melts into a thin layer and adds nothing. Match the foam to the drink temperature, and both will taste like they belong together.
How to Tell Your Foam Is Right
Look at the surface first. Good foam is glossy with no visible bubbles — if you can see individual bubbles, they need folding in with a swirl and a tap. The milk should pour like thin cream, not plop out in spoonfuls. If it holds soft peaks like whipped cream, it is over-aerated; if it pours exactly like plain milk, it is under-aerated.
The swirl test is the quickest check. Swirl the pitcher and watch the milk coat the inside: glossy, even coating means the bubbles are small and mixed through. A dull surface, or milk that separates into foam on top and liquid below, means it needs another swirl — you have a few seconds before it starts to settle.
Taste tells you the rest. Well-frothed milk tastes noticeably sweeter than the same milk just heated, because the foam spreads it across your tongue. If it tastes flat or cooked, it went past 70°C. If it tastes thin and watery, the wand was not purged and condensed water thinned it — purge first next time.
Mistakes That Ruin Your Foam
| Mistake | What you see | Fix |
|---|---|---|
| Milk steamed past 70°C | Flat, cooked taste; foam breaks down fast | Stop at 60–65°C; use the too-hot-to-hold test |
| Too much air in the stretch | Stiff bubble-bath foam sitting on top | Shorter stretch — a few seconds of gentle “tss-tss” only |
| Re-steaming leftover milk | Thin foam, dull taste | Fresh cold milk for every drink |
| Dirty steam wand | Sour or stale taste in the milk | Wipe and purge before and after every use |
| Big bubbles left in the milk | Blotchy white spots instead of smooth foam | Swirl and tap the pitcher before pouring |
| Pitcher too big for the milk | Wand cannot texture a shallow pool | Fill the pitcher a third to half full, or use a smaller one |
| Pouring foam from too high | Foam dives under the coffee and vanishes | Pour low and close for the topping |
Common Questions
Can I froth milk without a steam wand?
Yes. A French press gives the closest result — warm the milk, pump the plunger 30–40 times, rest and swirl. A handheld frother is faster, and a shaken jar works with no gear at all. None matches steam-wand microfoam for latte art, but all make a good cappuccino topping.
What milk froths best?
Whole dairy milk is the easiest to learn with — it holds fine, glossy foam and forgives small errors. Barista-edition oat milk is the best plant option. Skimmed milk foams fast but pours stiff, and almond milk often splits when steamed.
Why does my oat milk split in coffee?
Usually the milk was steamed too hot, or the coffee is very acidic and the milk went in too fast. Keep oat milk at 60–65°C like dairy, pour it slowly, and use a barista-edition oat milk — standard oat splits far more easily.
Can I re-froth milk that has already been steamed?
No, not well. Milk that has already been heated foams poorly the second time and tastes cooked. Pour fresh cold milk for each drink, and measure only what you need so nothing is wasted.
How hot should frothed milk be?
Aim for 60–65°C (140–150°F) — hot to drink, but not scalding. Much past 70°C (160°F) the milk tastes flat and cooked and the foam breaks down. While learning, stop steaming when the pitcher is too hot to hold comfortably for more than a second or two.
The Short Answer
How to froth milk is a two-part skill: add a little air, then heat to 60–65°C. A steam wand does both at once — a few seconds of gentle “tss-tss” near the surface, then a deeper whirlpool until the milk turns glossy. Without a machine, a French press is the best substitute, a handheld frother the fastest. Whole dairy milk foams easiest, barista oat is the best plant choice, and whatever milk you use, start cold, stop before 70°C, and swirl and tap the pitcher before you pour.