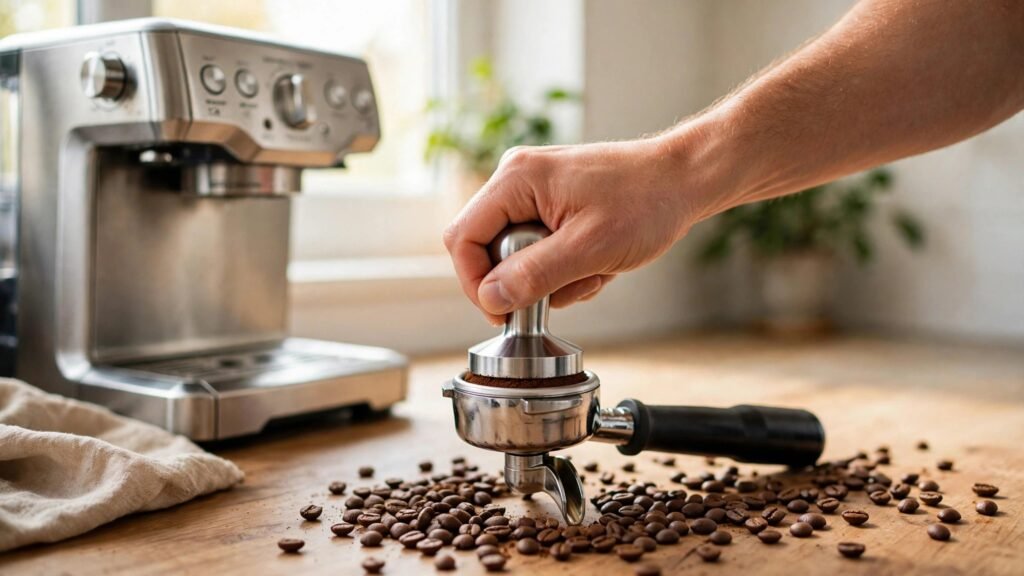
How to Tamp Espresso: Level, Even and Repeatable — the Pressure Number Matters Less Than You Think
How to tamp espresso is one of the first skills a home barista learns, and one of the most overcomplicated. Tamping means pressing the ground coffee in your portafilter into a flat, even puck so hot water passes through it evenly. Do it level and the same way every time, and your shots get steadier. Press crooked, and water finds the thin side — that is channelling, and it is why a shot can taste sour and bitter at once.
Tamping is a small skill, not a mystery. You need a tamper that fits your basket, a flat surface, and a repeatable motion. The pressure number everyone argues about matters far less than keeping the puck level.
What Tamping Actually Does
Ground coffee in a portafilter is loose and full of air gaps. Left alone, pressurised water would punch through the easiest path and barely touch the rest. Tamping compresses the grounds into a dense, even bed, so water works its way through the whole puck.
That even bed is what makes a shot extract evenly: water meets the same resistance everywhere and pulls flavour from all the coffee. The result is a balanced shot, finished in roughly 25–30 seconds on a pump machine running at 9 bars.
When the puck is uneven, water channels through the thin or loose side, over-extracting that part and under-extracting the rest. The shot often looks wrong too — thin, pale streams spurting from the portafilter instead of a steady, syrupy flow. If your shots taste sharp and hollow at once, an uneven tamp is one of the first things to check. It cannot fix everything, though: it will not rescue stale beans, a grind that is far too coarse, or a dose that is wrong for the basket.
The Pressure Number
Ask ten baristas how hard to press and you will get ten numbers: some say around 30 pounds, others 20–30 pounds, some 15–20 kilograms, others as little as about 10 kilograms. They do not even agree with each other — there is no single settled “correct” pressure.
What matters is that the puck is fully compressed and that you press the same way every time. Once the grounds stop compressing, pressing harder does almost nothing — it just tires your wrist and risks tilting the tamper.
A practical way to learn the feel is to press on a bathroom scale once, with your tamper, and notice what roughly 15 kilograms feels like — then stop weighing it. From then on, aim for firm, level, and repeatable. Beginners often press far too lightly because they are afraid of overdoing it, but a light press leaves the puck loose and water channels through it.
What You Need Before You Tamp
You do not need much gear, but the tamper has to fit. One even a millimetre smaller than your basket leaves a ring of loose grounds at the edge, and water channels straight through it. Most home machines use a 58 mm basket, compact machines often 54 mm — check yours and match it. Our guide to the best espresso machine notes the basket size for each pick.
A flat base is the safest choice for a beginner: it makes it easier to see and feel whether you are level. A level tamper — one with a guide that sits on the basket rim — is a handy training aid if you keep pressing crooked.
A tamping mat or a folded towel protects your counter and keeps the portafilter steady. A distribution tool or a simple leveller is optional; your finger or a gentle tap can level the grounds well enough to start. Do not use a random kitchen object as a tamper — a spoon bottom or a glass does not fit the basket.
How to Tamp Espresso, Step by Step
Start with a clean, dry portafilter. Old grounds or moisture in the basket will throw off the dose and make the puck stick.
1. Dose. Grind fine — almost powdery — straight into the basket. A common starting point for a double basket: 18 grams. Wipe grounds off the rim so the portafilter seals.
2. Distribute. Before you press anything, level the grounds. Tap the side of the portafilter gently, or sweep a finger across the top to spread the mound flat. Some people stir the grounds with a thin tool to break up clumps. The goal is simple: no hills, no bare patches, no clumps.
3. Set the tamper. Place the tamper on the grounds and check it sits flat — the gap to the basket rim should look the same all the way around. If one side sits lower, lift and reset: a crooked start becomes a crooked puck.
4. Press straight down. Keep your elbow above the tamper and wrist straight, then press firmly and evenly until the puck stops compressing. One smooth press is enough — do not lean into it or bounce.
5. Lift straight up. Pull the tamper up in one clean motion, without twisting hard. A light polish twist — a gentle quarter-turn — is optional. Do not press a second time; it can crack the puck.
6. Clean the rim and brew. Brush loose grounds off the rim, lock the portafilter in, and start the shot right away. A tamped puck left sitting dries at the edges, so do not tamp now and brew in five minutes.
Mistakes That Ruin a Good Puck
| Mistake | What happens | Fix |
|---|---|---|
| Tamping crooked | Water channels through the thin side | Reset the tamper and check the rim gap is even |
| Pressing harder to fix a fast shot | Puck cracks, channelling gets worse | Adjust the grind finer instead |
| Tapping the portafilter on the counter | Knocks grounds loose and cracks the puck | Tap the side gently before tamping, never after |
| Tamping twice | Second press fractures the puck surface | One press, then lift straight up |
| Tamping wet or old grounds | Puck sticks and extracts unevenly | Fresh grounds, dry basket, brew right away |
| Tamper smaller than the basket | Loose ring around the edge channels water | Match the tamper to your basket size |
The most common mistake is pressing harder to fix a fast shot. A puck can only compress so far — once dense, extra force cracks it, and cracks are what water loves. If a shot runs fast, the grind is too coarse or the dose is too low: fix those and keep the tamp the same.
Tapping the portafilter on the counter after tamping is another habit to drop: the knock breaks the seal between puck and basket wall, and water runs down that gap instead of through the coffee.
Tampers and Levelers: What Actually Helps
A basic flat tamper that fits your basket is all you need. Spend on fit, not features — a well-sized simple tamper beats a fancy one that leaves a loose ring.
A calibrated tamper clicks or stops at a set pressure, which can help while you are learning the feel. It is a training aid, not a requirement; once your hand knows the motion, the click adds little. The same goes for a distribution tool or leveller: it evens the grounds before you press, which helps if your grinder clumps, but a finger sweep does the same job.
Self-levelling tampers, with a collar that rests on the basket rim, force the base flat — worth considering if you keep pressing crooked despite practice. They cost more than a basic tamper and only fit one basket size, so check the size before buying.
When Tamping Is Not the Problem
If your tamp is level and repeatable but shots still taste off, the problem is upstream — usually the grind or the dose. A shot that runs fast and tastes sour means the grind is too coarse or the dose is too low. Go finer a notch at a time, keeping the tamp exactly the same, until the shot lands in the 25–30 second range. A shot that drips, stalls, or tastes bitter usually means the grind is too fine or the dose is too high.
Stale beans are another suspect: coffee roasted weeks ago loses the gas that builds crema, and no tamp brings it back. Fresh beans, ground just before brewing, matter more than any tamping trick — our guide to the best coffee beans for espresso covers what to look for and why roast date matters more than brand.
Uneven distribution is the last usual culprit: if the grounds are clumped on one side before you tamp, the puck is uneven no matter how level your press is. Change one thing at a time and keep the tamp constant, so you know which change fixed the shot.
Common Questions
How hard should I tamp espresso?
Firmly enough that the puck stops compressing, and the same way every time. Guidance ranges from about 10 kilograms to 30 pounds — no single number is settled. Level and repeatable beats hard.
Do I need a tamper, or can I use something else?
You need a tamper that fits your basket. A spoon bottom or a glass presses unevenly and leaves loose grounds at the edges. A basic flat tamper in the right size is inexpensive and does the job.
Should I twist the tamper after pressing?
A light polish twist is optional: a gentle quarter-turn smooths the surface but changes little. Never twist hard or press a second time — that can crack the puck.
Does tamping harder make stronger coffee?
No. Once the puck is compressed, extra force does nothing except risk cracking it. Strength comes from dose and ratio — more coffee, or less water per gram — not from pressing harder.
Why does my espresso spray or spurt from the portafilter?
Spurting usually means channelling: water forcing its way through a crack or thin spot. The usual causes are an uneven tamp, poor distribution, or clumps. Distribute evenly, tamp level, and check your tamper fits the basket.
The Short Answer
Tamping espresso means pressing the grounds into a flat, even puck so water extracts evenly. Dose around 18 grams into a double basket, distribute level, set the tamper flat, and press straight down firmly until the puck stops compressing — then lift and brew right away. The pressure number matters less than consistency: guidance ranges from about 10 kilograms to 30 pounds, with no single figure settled, so aim for level and repeatable instead of hard. If shots still run fast or taste sour with a good tamp, look upstream — grind finer, check the dose, distribute better, use fresh beans.